In manicures and pedicures, nail drill bits are essential tools for precise and efficient work. However, since these tools come into direct contact with the client’s nails and skin, hygienic cleaning is crucial not only for aesthetics but also for health and safety. This detailed guide explains how to properly clean and disinfect drill bits to meet professional and regulatory standards.
Why Is Cleaning Drill Bits Important?
Drill bits can harbor microscopic debris and pathogens. Poor hygiene can lead to:
- Spread of infections (fungal, bacterial, viral)
- Loss of client trust
- Fines or even salon closure
Using clean, disinfected tools is a basic requirement for professional service.
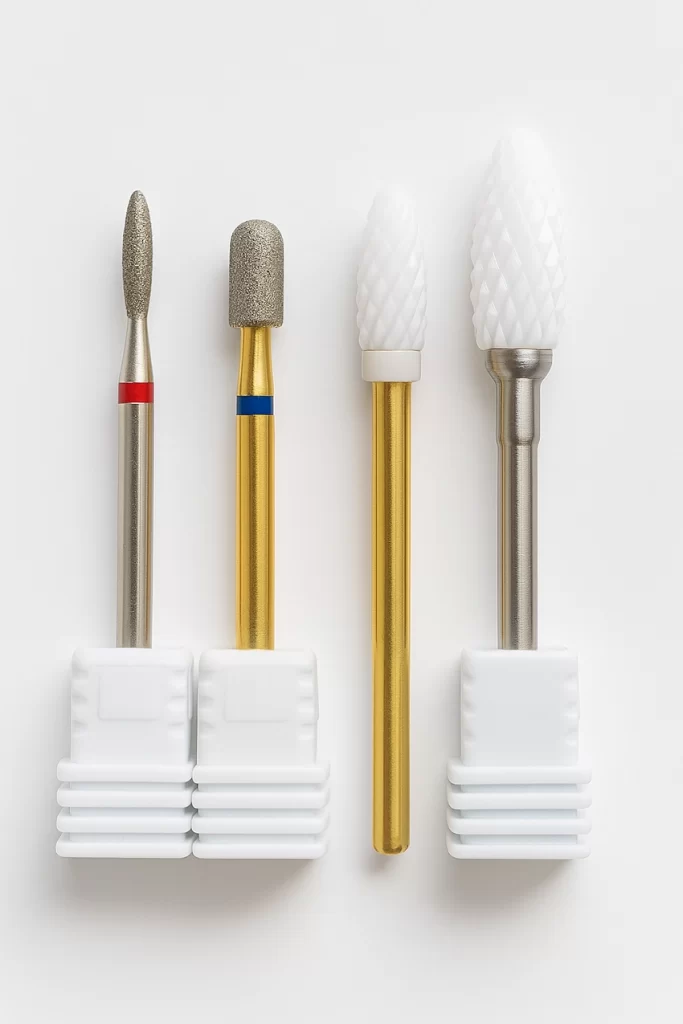
Types and Materials of Drill Bits
- Diamond drill bit – durable and precise, but sensitive to improper cleaning
- Ceramic drill bit – gentler, ideal for beginners and sensitive skin
- Carbide drill bit – excellent for heavy material removal, long-lasting
- Silicone polishing bits – for smoothing and polishing surfaces
Each type requires different cleaning attention, so it’s important to know the material’s properties.
Cleaning and Disinfection Protocol
1. Mechanical Cleaning
- Immediately after use, remove dust with a soft brush.
- Rinse under running water to remove stubborn debris.
2. Disinfection
- Use a tool disinfectant compatible with the bit’s material.
- Soak for the manufacturer’s recommended time (usually 10–15 minutes).
- Ensure proper concentration and temperature.
3. Drying
- Place on a clean, lint-free towel or air-dry.
- Never store while wet, as this can damage the material and promote bacterial growth.
4. Sterilization
- UV sterilizer: an additional step after disinfection.
- Autoclave: the most effective sterilization method, using high heat and pressure.
Common Mistakes to Avoid
- Short soaking time in disinfectant
- Using incompatible chemicals that damage the bit’s surface
- Storing tools while still wet, leading to mold
- Not cleaning immediately after each client
Nail technician cleaning a drill bit with a soft brush
Recommended Tools and Materials
- Professional tool disinfectant solution
- Soft-bristled brush
- UV sterilizer or autoclave
- Lint-free towel
Timing and Frequency
- Between clients: full disinfection after every use
- End of day: thorough cleaning, drying, and sterilization
- Weekly: inspect drill bits for wear or damage and replace if necessary
Tips for Longer Lifespan
- Avoid overly harsh chemicals
- Never use metal-bristled brushes, which can scratch the surface
- Store in a dry, dust-free container
- Sterilize only as recommended by the manufacturer
Frequently Asked Questions (FAQ)
Can all drill bits be sterilized in an autoclave?
No, silicone and some plastic components can be damaged by high heat.
Is UV sterilization enough?
No, UV light does not replace chemical disinfection—it should only be used as an additional step.
How many times can a drill bit be used?
It depends on the material and usage, but professional-quality bits can serve hundreds of clients with proper maintenance.
Key Points to Remember About Cleaning Drill Bits
Hygienic cleaning of drill bits is essential for safe and professional manicures and pedicures. After each use, mechanical cleaning, disinfection, and proper drying are required, with autoclave sterilization recommended for the highest level of safety. Avoid harsh chemicals and improper storage to extend the lifespan of your tools. Clean drill bits not only protect your client’s health but also maintain your salon’s good reputation.
